πŸ›‘ Admin Panel

Exam Bot Management β€” sign in with your admin account.

Dashboard

View Site
Loading...
…

Questions by Department

Loading…

Quick Actions

Questions

IDQuestionDept / CatYearAnswerTypeActions
Loading…

Users

πŸ“₯ Export CSV
IDNameEmailUsernameScoreStatusJoinedLast Seen
Loading…

πŸ’Ž Upgrade User to Premium

Upgrades an existing, registered account β€” it never creates a new user.

πŸ› Change User Departments

Enter the user then click Load to see their current departments.

♻️ Update existing questions (match on ID)

Export a department, edit it in Excel, upload it back here. Rows are matched on id and the existing question is overwritten β€” including course_name and course_theme.
Only columns present in your file are touched. Blank option_e–g, explanation or the course columns clear that value; blank question_text, option_a–d or correct_answer are ignored rather than wiping content.
This edits live questions. Export a copy first if unsure.

♻️

Click to select the edited .xlsx or .csv

πŸ“₯ Import Excel (.xlsx)

Required: department, question_text, option_a–d, correct_answer.
Optional: year, option_e–g, explanation, is_premium.
β˜… Ratings are assigned automatically β€” within each exam year, the first third of questions are rated 5.0, the next third 4.8, the rest 4.5.

πŸ“‚

Click to select .xlsx file

πŸ“₯ Import CSV

Same columns as Excel. Save as UTF-8 CSV.
β˜… Ratings are assigned automatically β€” new questions continue from where the department left off.

πŸ“„ Download CSV Template
πŸ“„

Click to select .csv file

πŸ—‘ Bulk Delete Questions

⚠️ Permanently deletes all matching questions β€” this cannot be undone.

πŸ“Š Questions

Questions with id, department, category, exam year, options, answer, explanation and course mapping. Excel adds a course-coverage sheet.

πŸ‘₯ Users CSV

All user accounts with scores, premium status and join dates.

πŸ“₯ Download Users CSV
Loading…

πŸ“š Study Materials

Manage uploaded books and PDFs
Loading…

πŸ’¬ User Comments

# Author Comment Type πŸ‘ Posted Actions
Loading…
Loading…

πŸ“£ Notices

Title Body Audience Status Created
Loading…

πŸ“‹ Audit Logs

Loading…

πŸ‘‘ Admin Users

TG IDNameUsernameAdded
Loading…

Add Admin

User must have started the bot at least once.

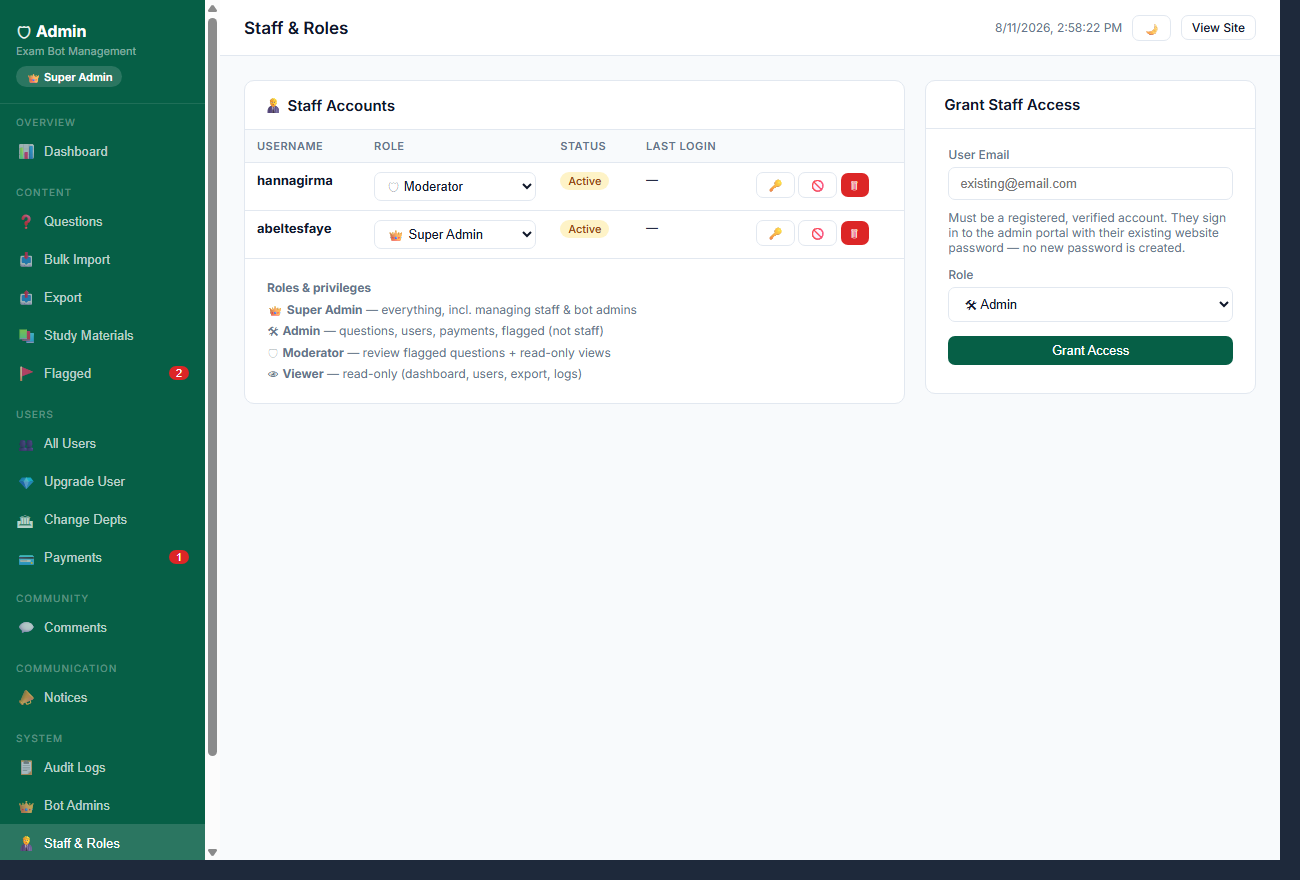
πŸ§‘β€πŸ’Ό Staff Accounts

UsernameRoleStatusLast login
Loading…
Roles & privileges
πŸ‘‘ Super Admin β€” everything, incl. managing staff & bot admins
πŸ›  Admin β€” questions, users, payments, flagged (not staff)
πŸ›‘ Moderator β€” review flagged questions + read-only views
πŸ‘ Viewer β€” read-only (dashboard, users, export, logs)

Grant Staff Access

Must be a registered, verified account. They sign in to the admin portal with their existing website password β€” no new password is created.

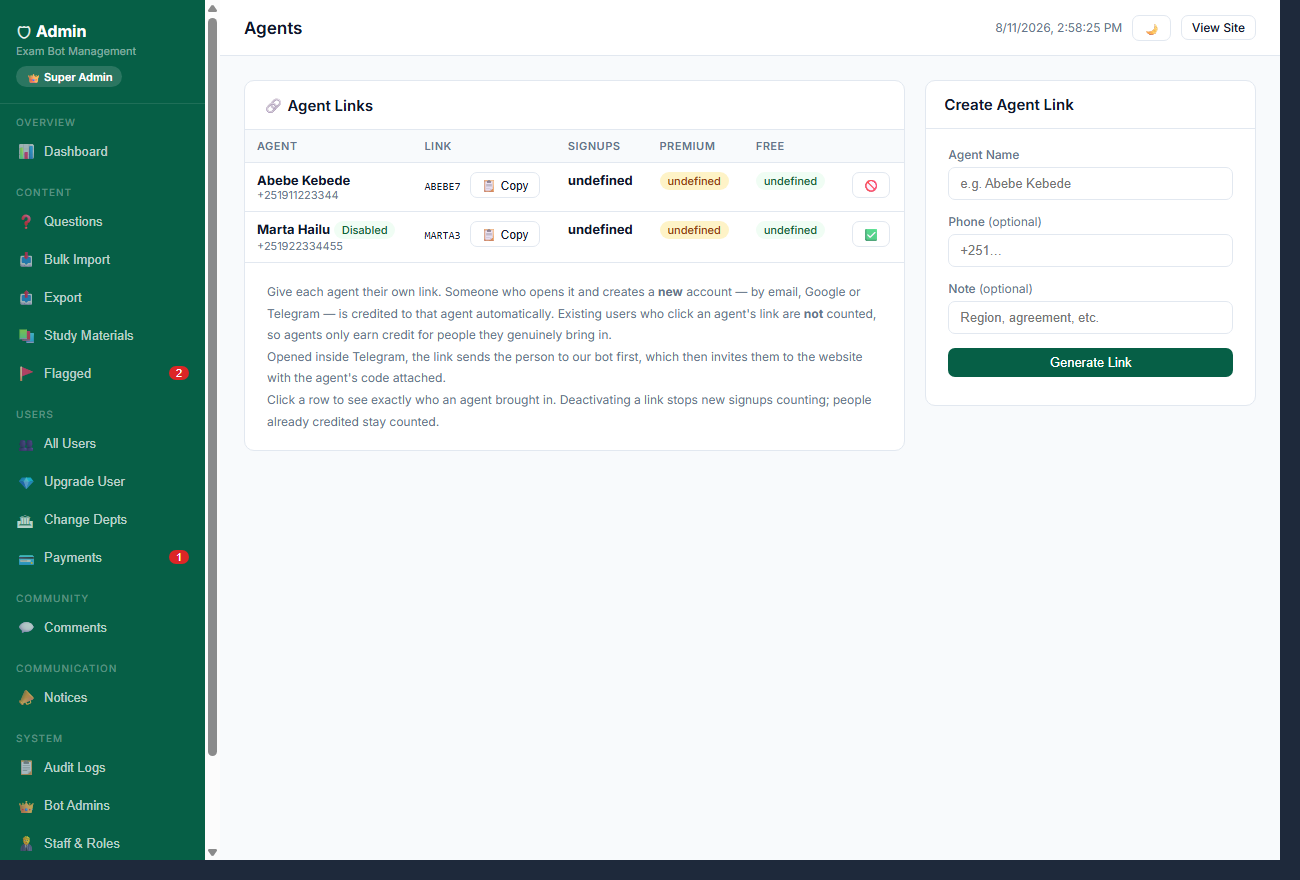
πŸ”— Agent Links

AgentLinkSignupsPremiumFree
Loading…
Give each agent their own link. Someone who opens it and creates a new account β€” by email, Google or Telegram β€” is credited to that agent automatically. Existing users who click an agent's link are not counted, so agents only earn credit for people they genuinely bring in.
Opened inside Telegram, the link sends the person to our bot first, which then invites them to the website with the agent's code attached.
Click a row to see exactly who an agent brought in. Deactivating a link stops new signups counting; people already credited stay counted.

Create Agent Link

πŸ“– Admin User Manual

What every item in the sidebar is for, how to use it, and what to be careful with. Each section shows the screen you will see. If an item is missing from your sidebar, your role does not include it β€” ask a super admin in Staff & Roles.

πŸ‘ Viewerreads everything, changes nothing
πŸ›‘ Moderator+ resolves flagged questions
πŸ›  Admin+ questions, users, payments
πŸ‘‘ Super Admin+ staff and roles

Everything you change is recorded in Audit Logs under your name. That protects you as much as the data β€” when something looks wrong, the log shows what actually happened.

πŸ“Š

Dashboard

Overview
all roles

The numbers you are accountable for, at a glance: users, questions, quiz sessions, and anything waiting on you.

  1. The two tiles that need action are Pending Payments and Flagged Questions. If either shows a number, someone is waiting β€” the same counts appear as red badges in the sidebar.
  2. Questions by Department shows where the bank is thin. A department with a low count is where new questions are worth the most.
  3. Quick Actions jump straight to the jobs you do most, so you do not have to hunt through the sidebar.
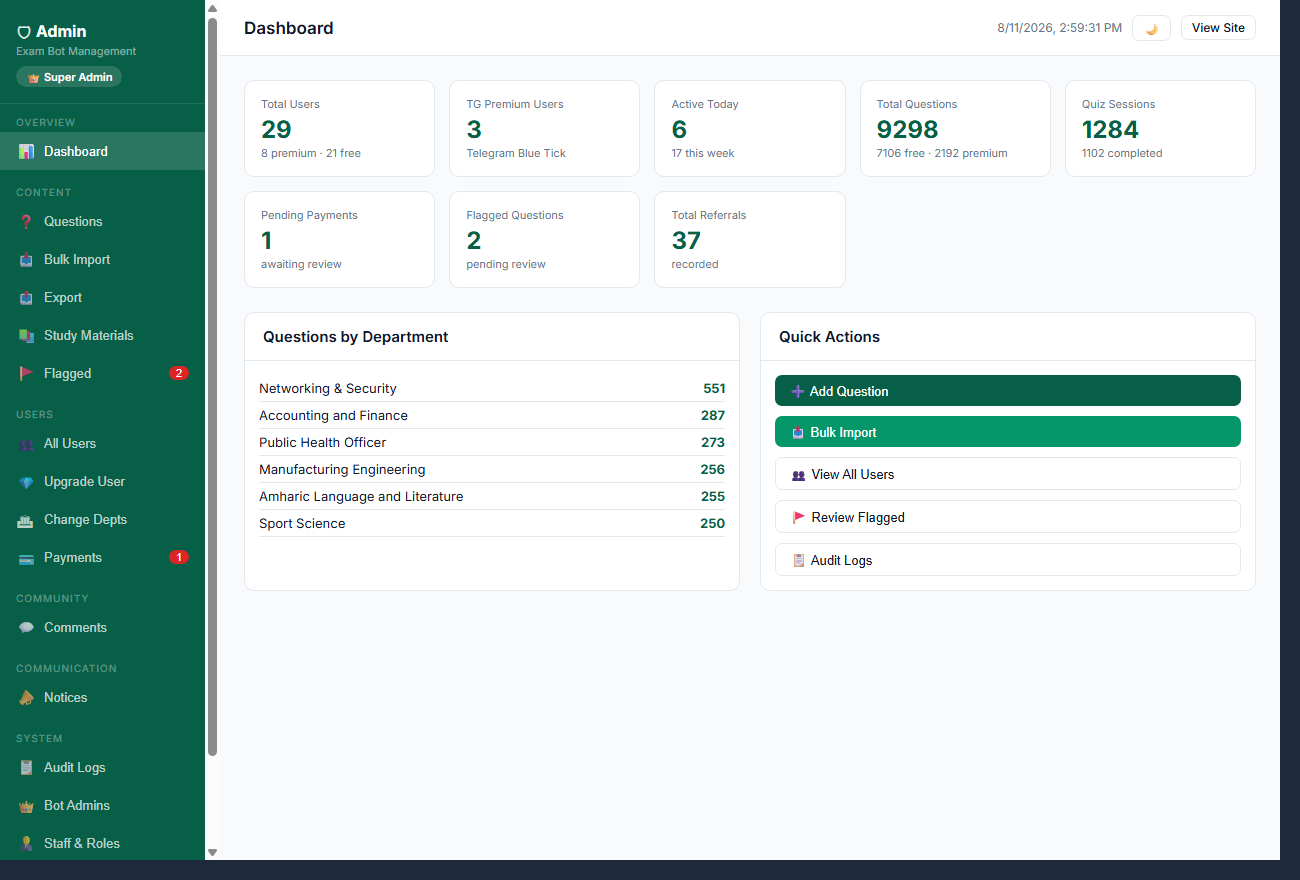
The Dashboard page of the admin panel
Dashboard β€” click the image to open it full size
❓

Questions

Content
needs manage_questions

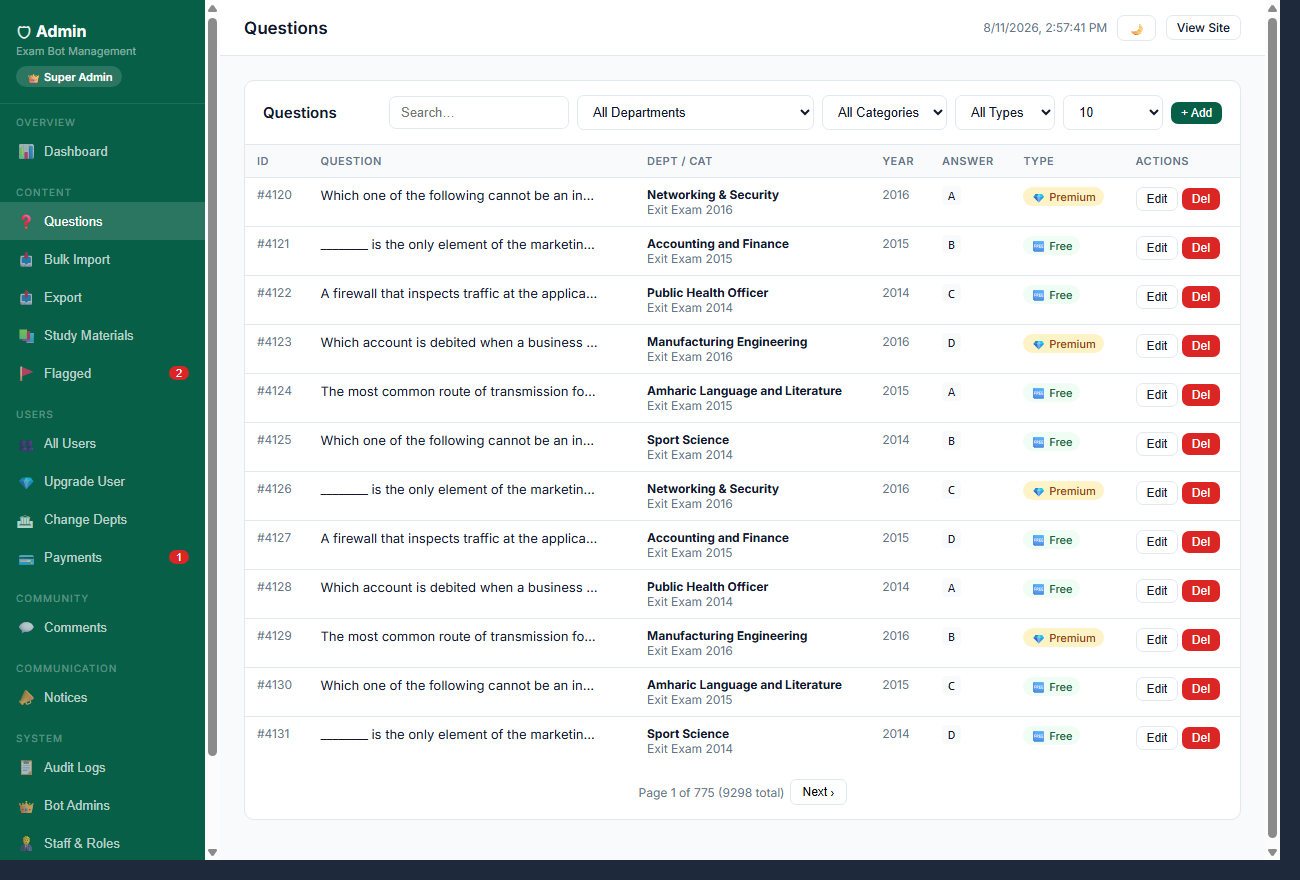
The whole question bank β€” search it, filter it, fix a question, or add one by hand.

  1. Filter by department, category and Free/Premium, then use Search for words inside the question text.
  2. Edit opens the question with its options and correct answer. Changing the correct answer affects every student who answers it from now on β€” it does not rescore past answers.
  3. + Add is for one-off questions. For anything more than a handful, use Bulk Import instead.
  4. Del is permanent. If a question is merely wrong, fix it rather than deleting it, so students keep their history.

Every edit and delete is written to Audit Logs with your name on it.

The Questions page of the admin panel
Questions β€” click the image to open it full size
πŸ“₯

Bulk Import

Content
needs manage_questions

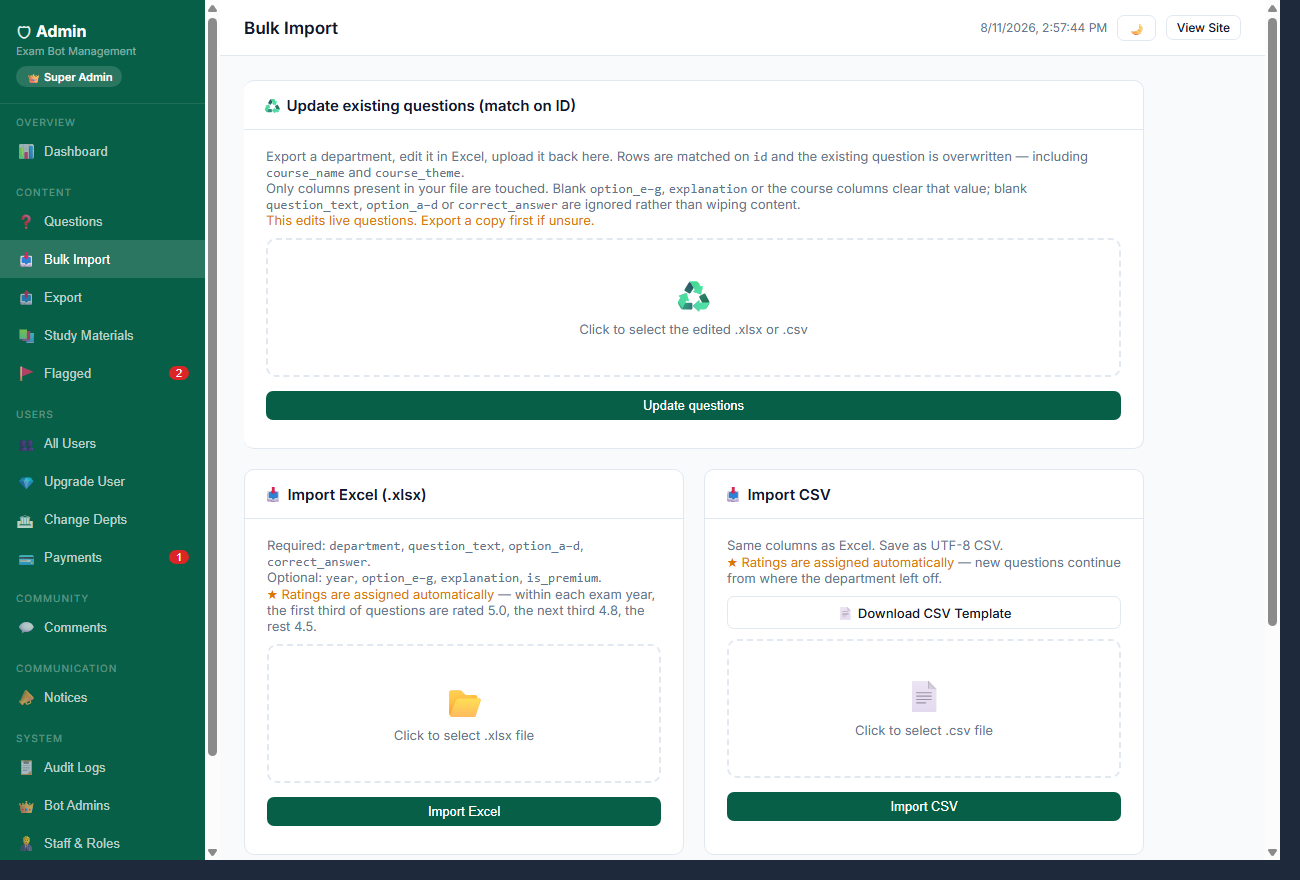
Load many questions at once from an Excel or CSV file β€” the fastest way to grow the bank.

  1. Pick the department first, then the file. The importer skips questions the department already has, so re-running the same file does not create duplicates.
  2. Update existing questions (match on ID) is for corrections: the file must carry the question ID, and matching rows are overwritten in place.
  3. Bulk Delete removes everything you select. Read the confirmation count before you accept it.
  4. After an import, spot-check a few rows in Questions β€” a shifted column turns every answer wrong at once.

Import a small test file first whenever the spreadsheet comes from a new source.

The Bulk Import page of the admin panel
Bulk Import β€” click the image to open it full size
πŸ“€

Export

Content
all roles

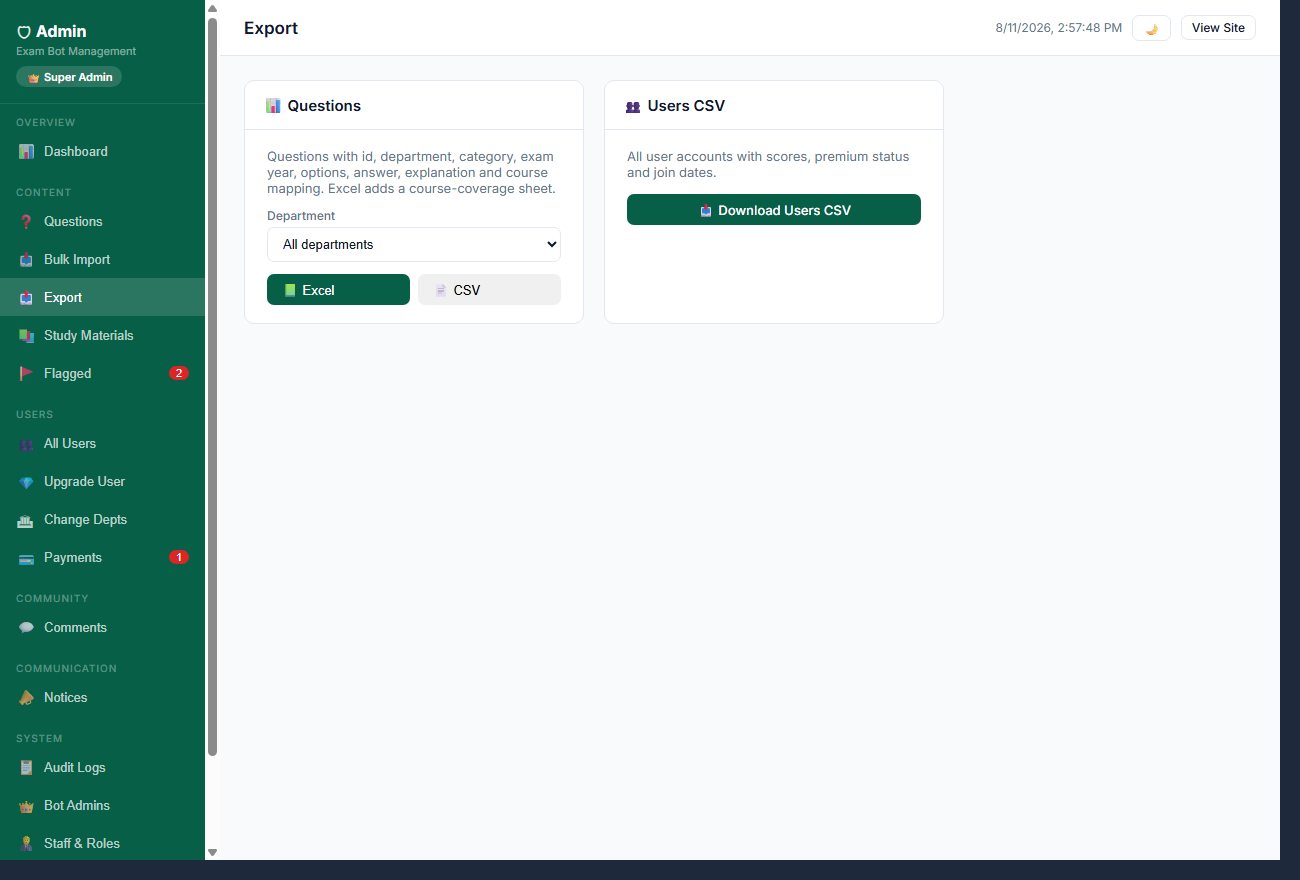
Download the question bank or the user list as a spreadsheet, for editing offline or keeping a backup.

  1. Excel keeps Amharic text and formatting intact β€” prefer it over CSV for anything you plan to re-import.
  2. Exported question files carry the question ID, which is exactly what the update-by-ID import needs.
  3. Users CSV contains personal data. Keep it off shared drives and delete your copy when the task is done.
The Export page of the admin panel
Export β€” click the image to open it full size
πŸ“š

Study Materials

Content
needs manage_questions

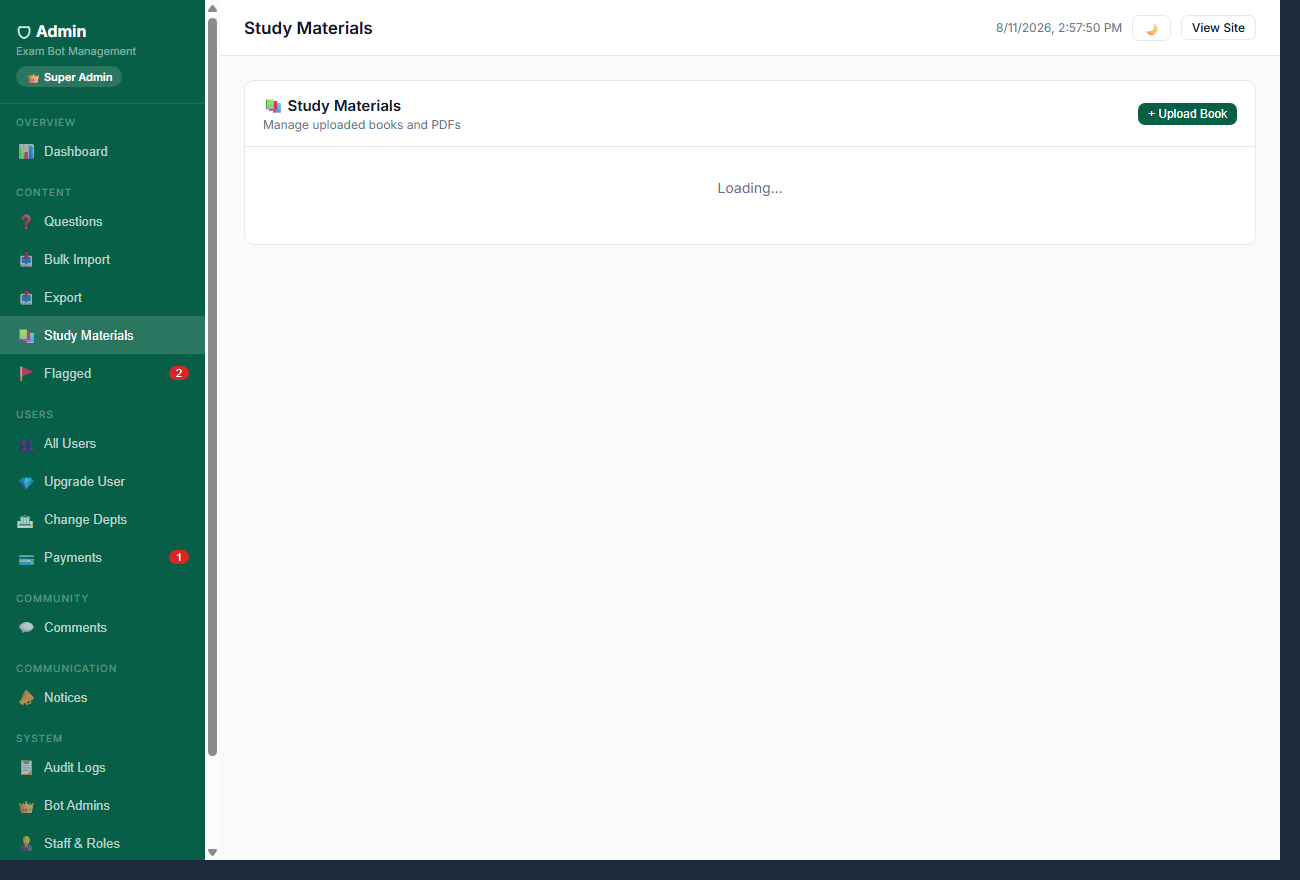
Lecture notes and PDFs students can read in the app, plus the queue of files they have uploaded.

  1. Uploads from students arrive as pending and stay invisible until you approve them.
  2. Open the file before approving. Check it is the right department, readable, and not someone else's personal notes with their name and phone number on them.
  3. + Upload Book adds a file yourself; it is approved immediately.

Anything you approve becomes visible to every student in that department.

The Study Materials page of the admin panel
Study Materials β€” click the image to open it full size
🚩

Flagged

Content
needs manage_flagged

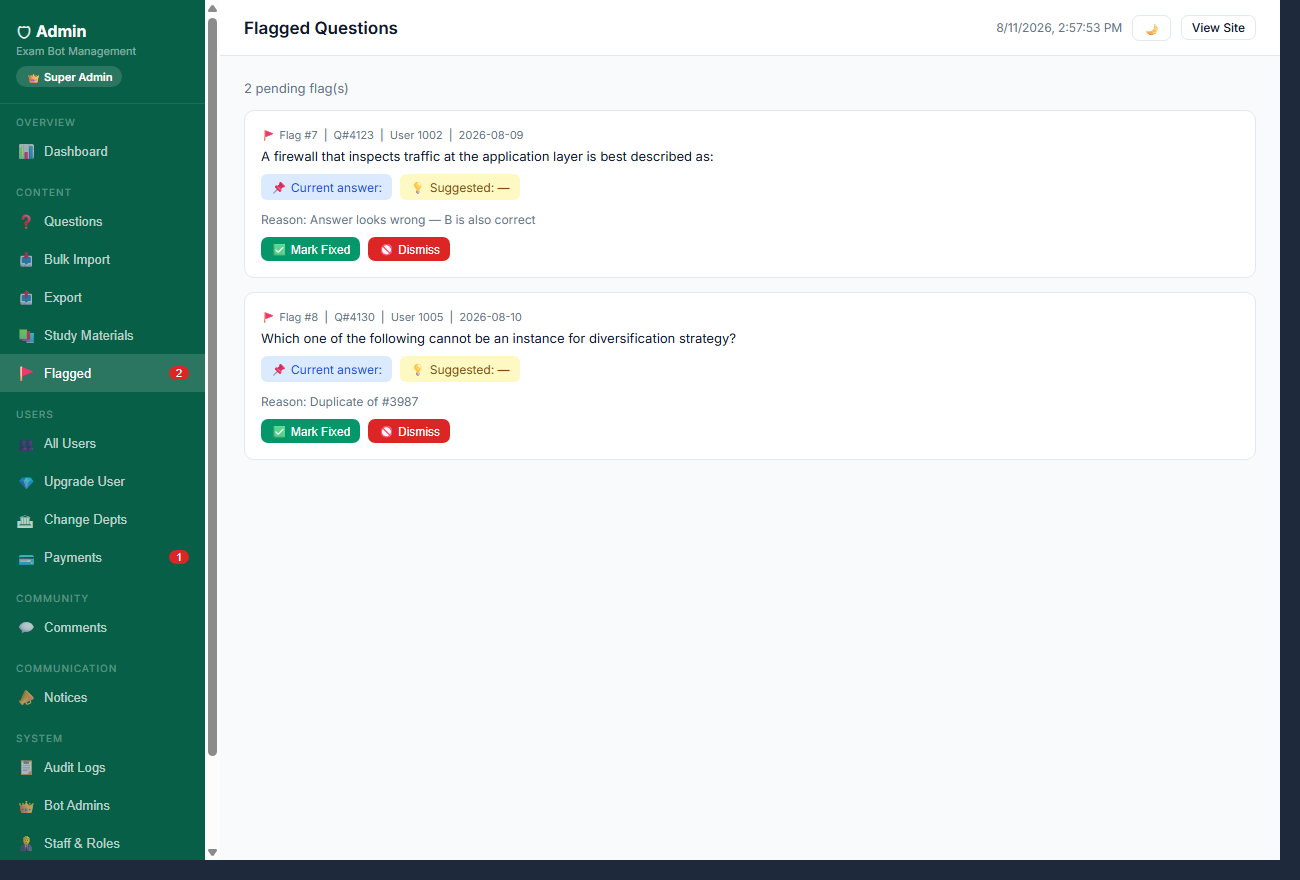
Problems students reported on specific questions β€” usually a wrong answer, a typo, or a duplicate.

  1. Each row shows the question and the reason given. Open the question, decide, and fix it in Questions if the report is right.
  2. Resolve clears the flag and the sidebar badge. Resolve it whether or not you changed anything β€” a flag left open hides the next real report.
  3. The same question flagged by several students is usually a genuine error, not a misunderstanding.
The Flagged page of the admin panel
Flagged β€” click the image to open it full size
πŸ‘₯

All Users

Users
all roles

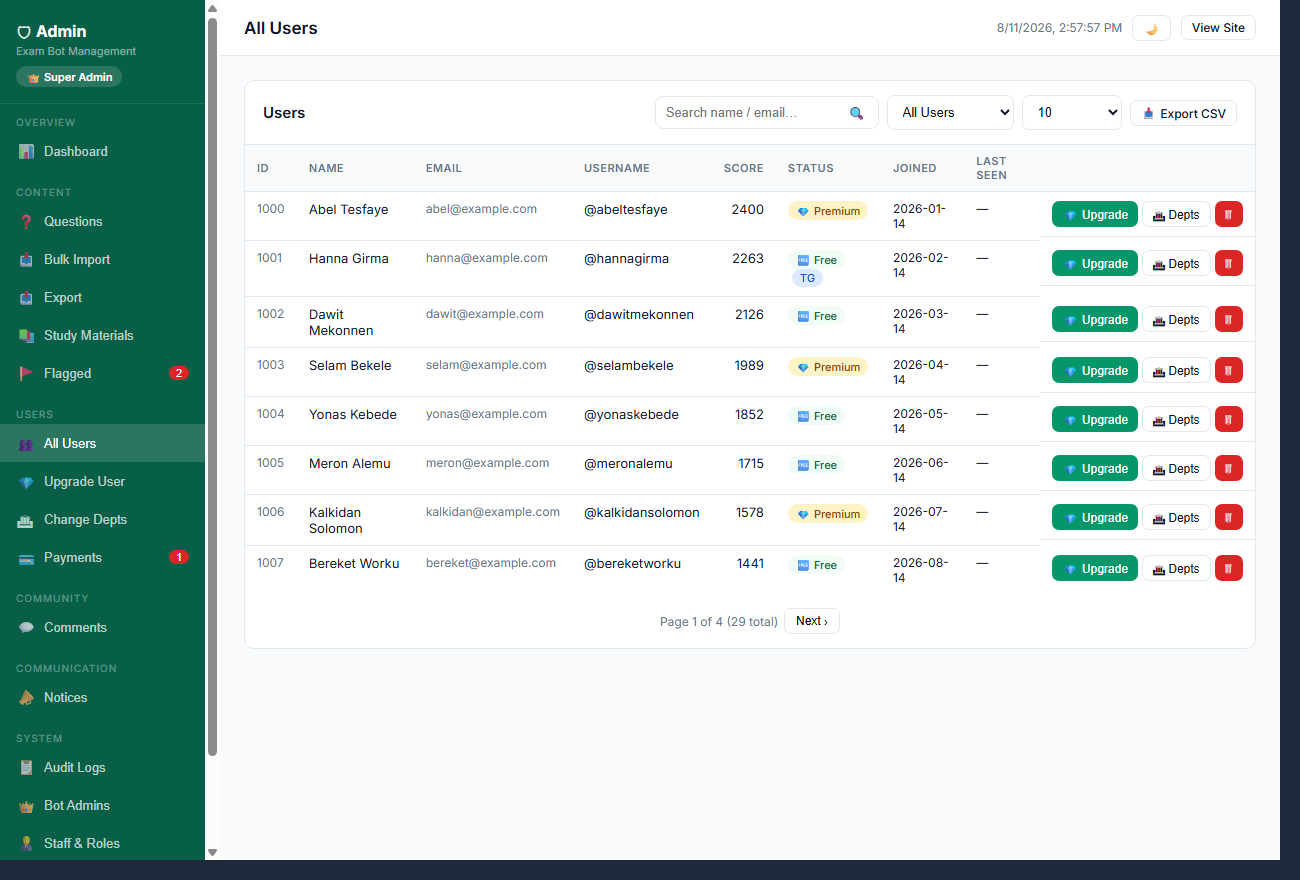
Every registered student, with their plan, score and how they signed up.

  1. Search by name or email; filter by Free or Premium.
  2. TG marks an account linked to Telegram; πŸ’Ž Premium shows a paid plan and its expiry.
  3. This page is for looking things up. To change a plan use Upgrade User, and to change departments use Change Depts.
The All Users page of the admin panel
All Users β€” click the image to open it full size
πŸ’Ž

Upgrade User

Users
needs manage_users

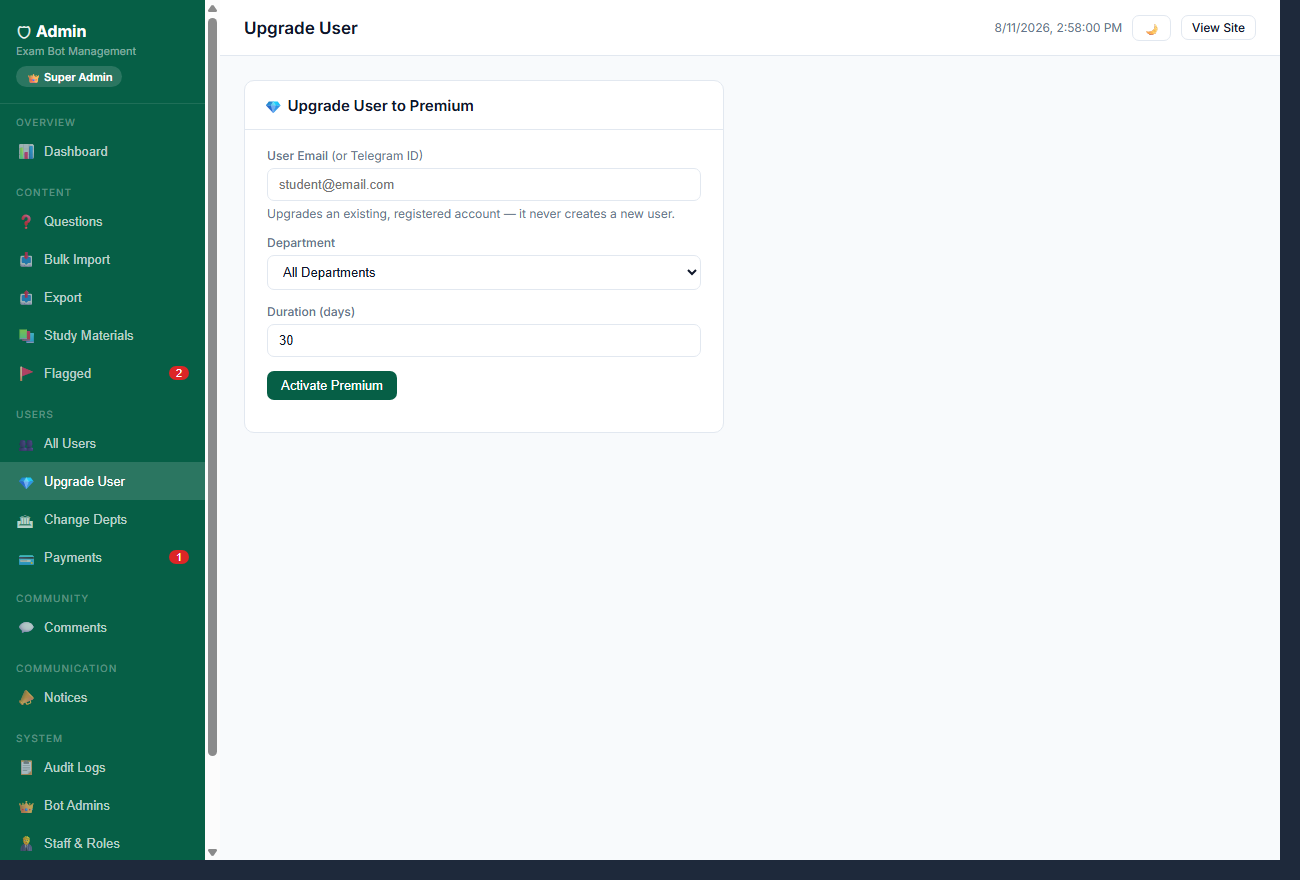
Grant premium to one student by hand β€” for an approved bank transfer, a promotion, or a fix.

  1. Enter the exact email the student registered with, choose the duration, and activate.
  2. Check All Users first if the email might be mistyped; an upgrade applied to the wrong account has to be undone by hand.
  3. For a payment the student submitted in the app, use Payments instead β€” approving there records the payment alongside the upgrade.

Every upgrade is logged with your name, the account and the duration.

The Upgrade User page of the admin panel
Upgrade User β€” click the image to open it full size
πŸ›

Change Depts

Users
needs manage_users

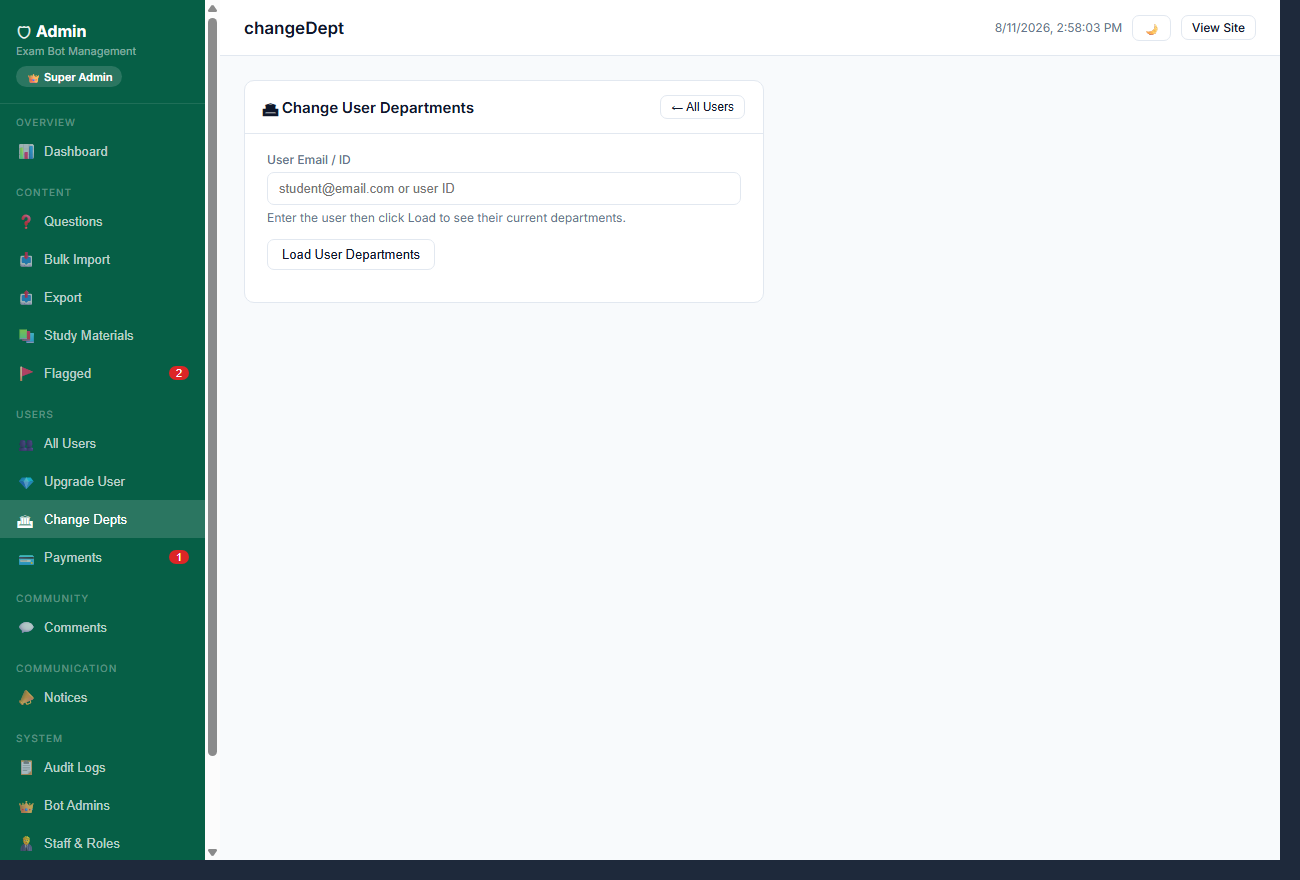
Change which departments a student sees β€” normally because they picked the wrong one at signup.

  1. Load the student by email or user ID, tick the departments they should have, and save.
  2. Removing a department hides its questions from them; their answer history is kept and returns if you add it back.
  3. Confirm with the student before changing this. It changes what their whole app shows.
The Change Depts page of the admin panel
Change Depts β€” click the image to open it full size
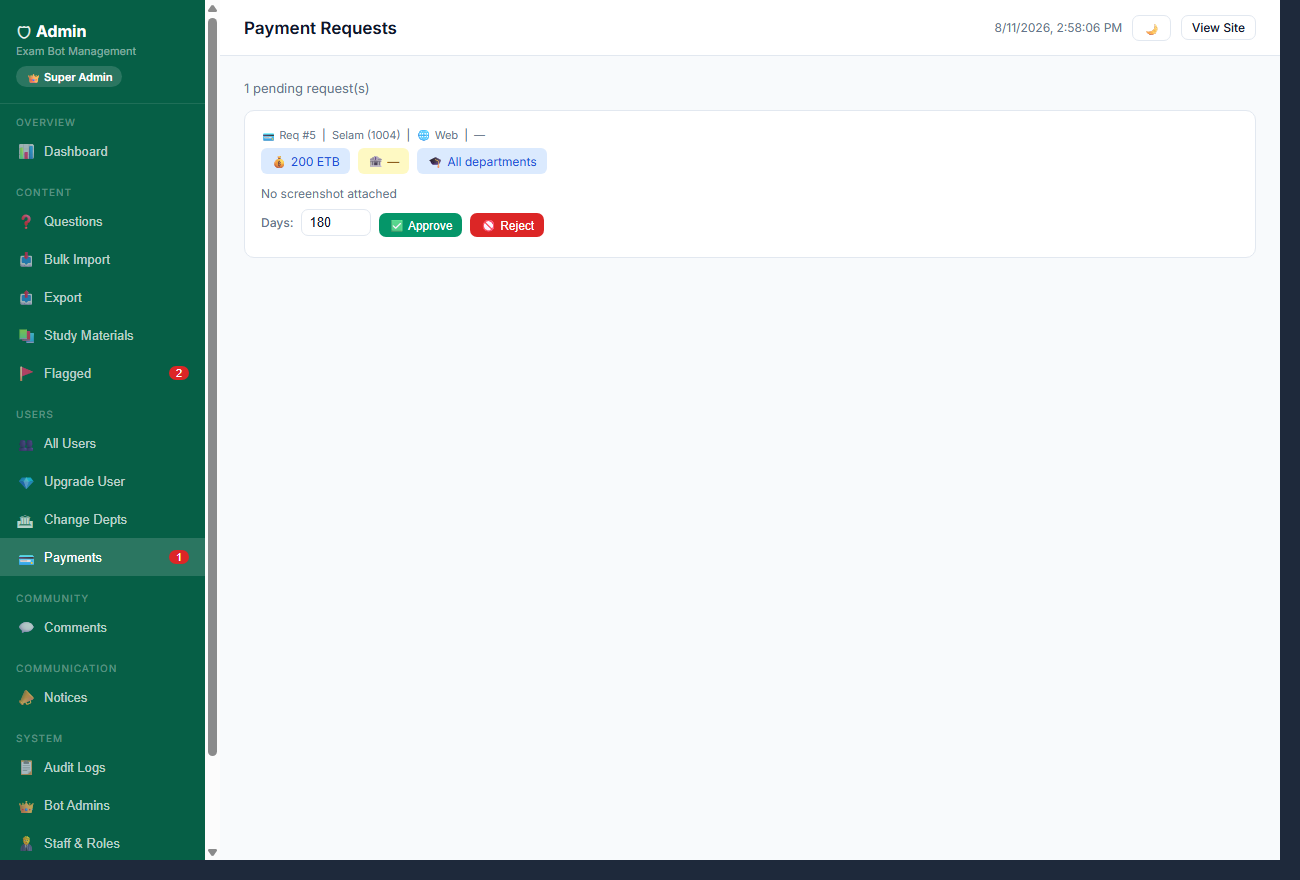
πŸ’³

Payments

Users
needs manage_payments

Premium payment requests students submitted in the app, each with a payment screenshot.

  1. Open the screenshot and check the amount, the date and the receiving account before approving anything.
  2. Approve activates premium for the requested period immediately and notifies the student.
  3. Reject when the screenshot is unreadable, the amount is short, or the transfer cannot be found. The student can submit again.
  4. If you are unsure, leave it pending and ask a senior admin β€” an approval is far harder to walk back than a delay.

Approvals and rejections are both recorded in Audit Logs with your name.

The Payments page of the admin panel
Payments β€” click the image to open it full size
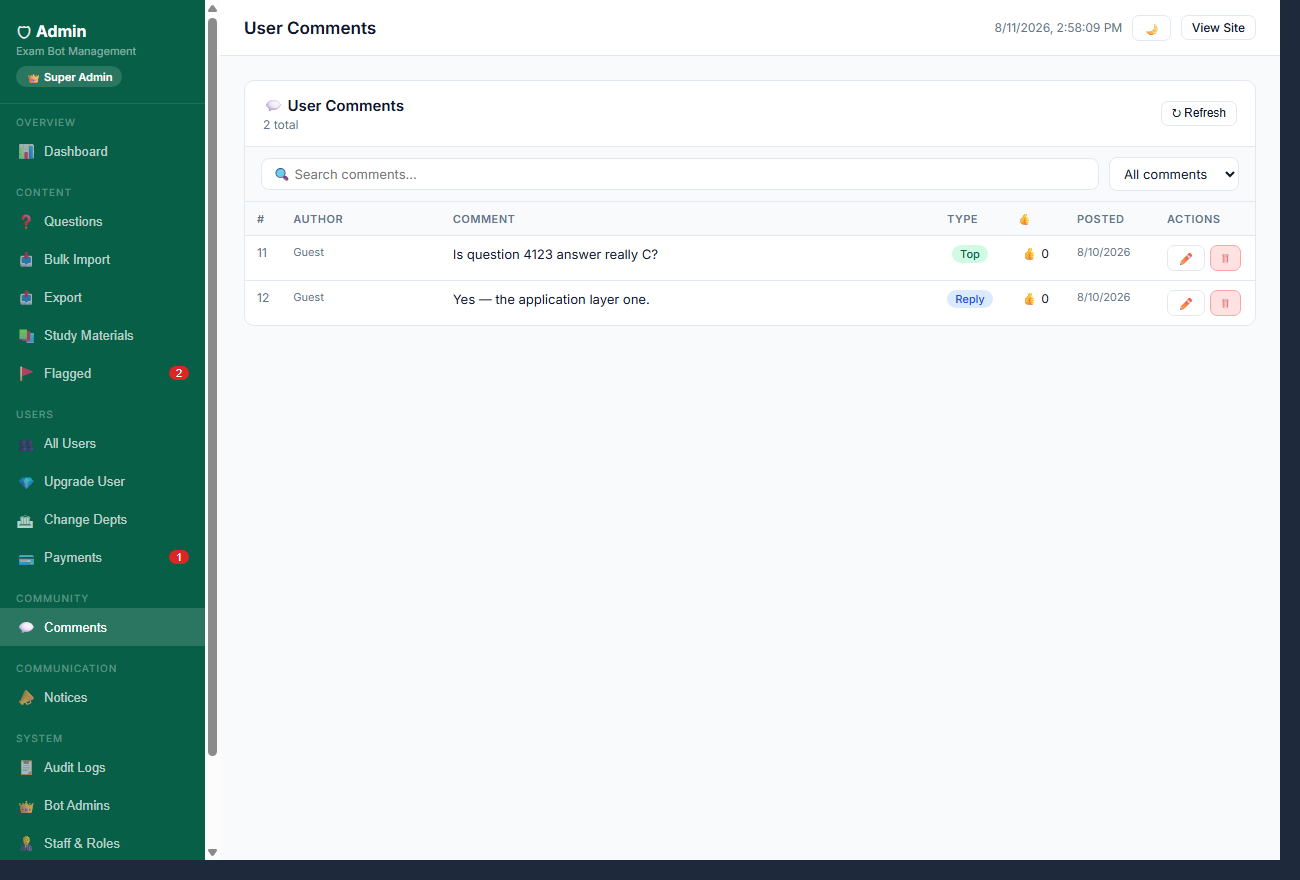
πŸ’¬

Comments

Community
all roles

Everything students have posted in the discussion area, newest first.

  1. Search to find a post; replies appear under the comment they answer.
  2. Edit is for trimming something inappropriate out of an otherwise useful post; Delete removes it entirely.
  3. Remove abuse, phone numbers and exam-leak claims. Leave ordinary disagreement alone β€” the discussion is most of the value.
The Comments page of the admin panel
Comments β€” click the image to open it full size
πŸ“£

Notices

Communication
all roles

Announcements shown to students inside the app β€” deadlines, maintenance, new content.

  1. Write a short title and a one-line message, pick an icon and colour, then save.
  2. A notice only appears while it is active. Turn it off the moment it stops being true; a stale notice teaches students to ignore all of them.
  3. Keep one active notice at a time unless there is a genuine second thing to say.
The Notices page of the admin panel
Notices β€” click the image to open it full size
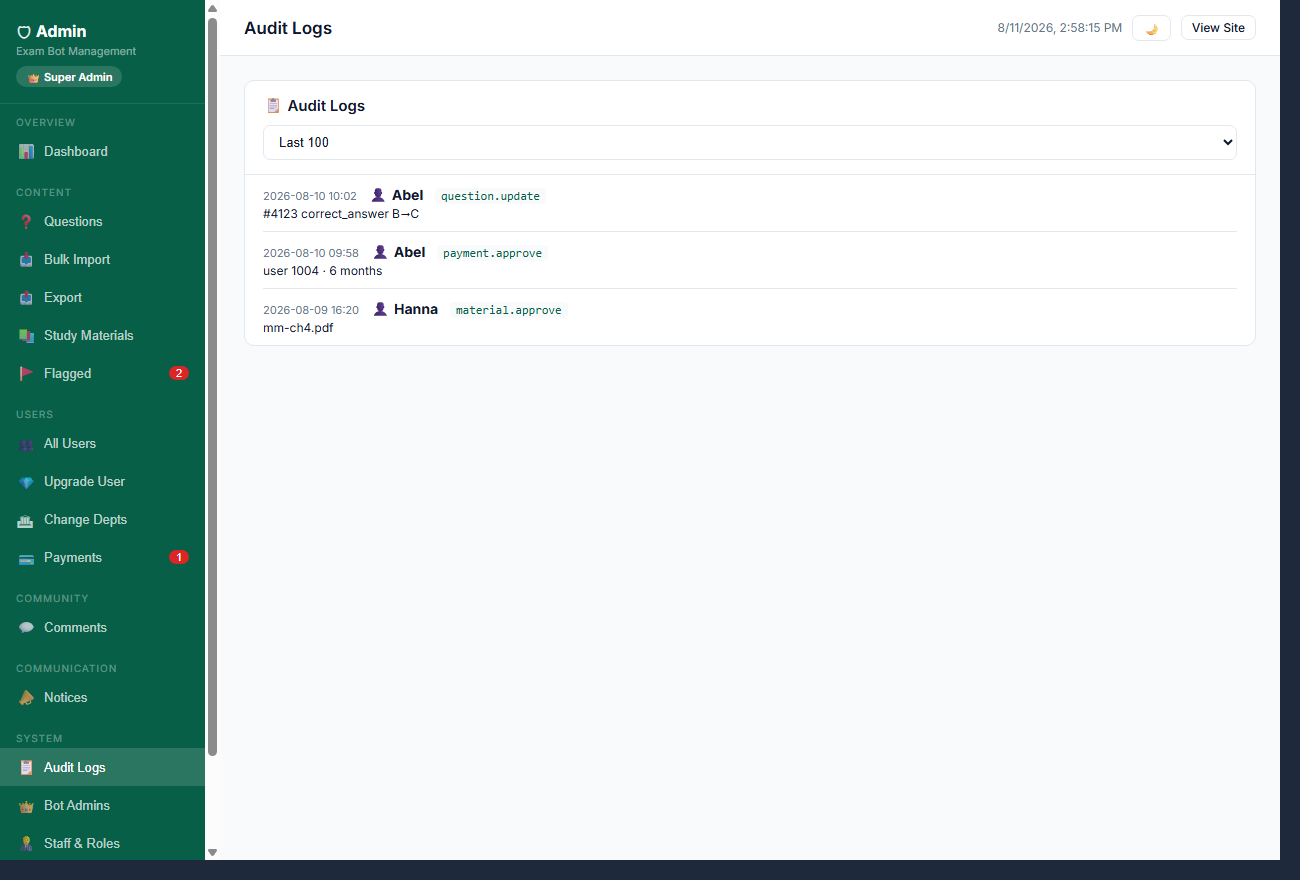
πŸ“‹

Audit Logs

System
all roles

Who did what, and when. Every admin action that changes data is recorded here.

  1. Each row shows the admin, the action, the affected record and the time.
  2. This is where you check before asking anyone anything: who approved that payment, who edited that question, when a material was published.
  3. Entries cannot be edited or removed by anyone, including super admins.
The Audit Logs page of the admin panel
Audit Logs β€” click the image to open it full size
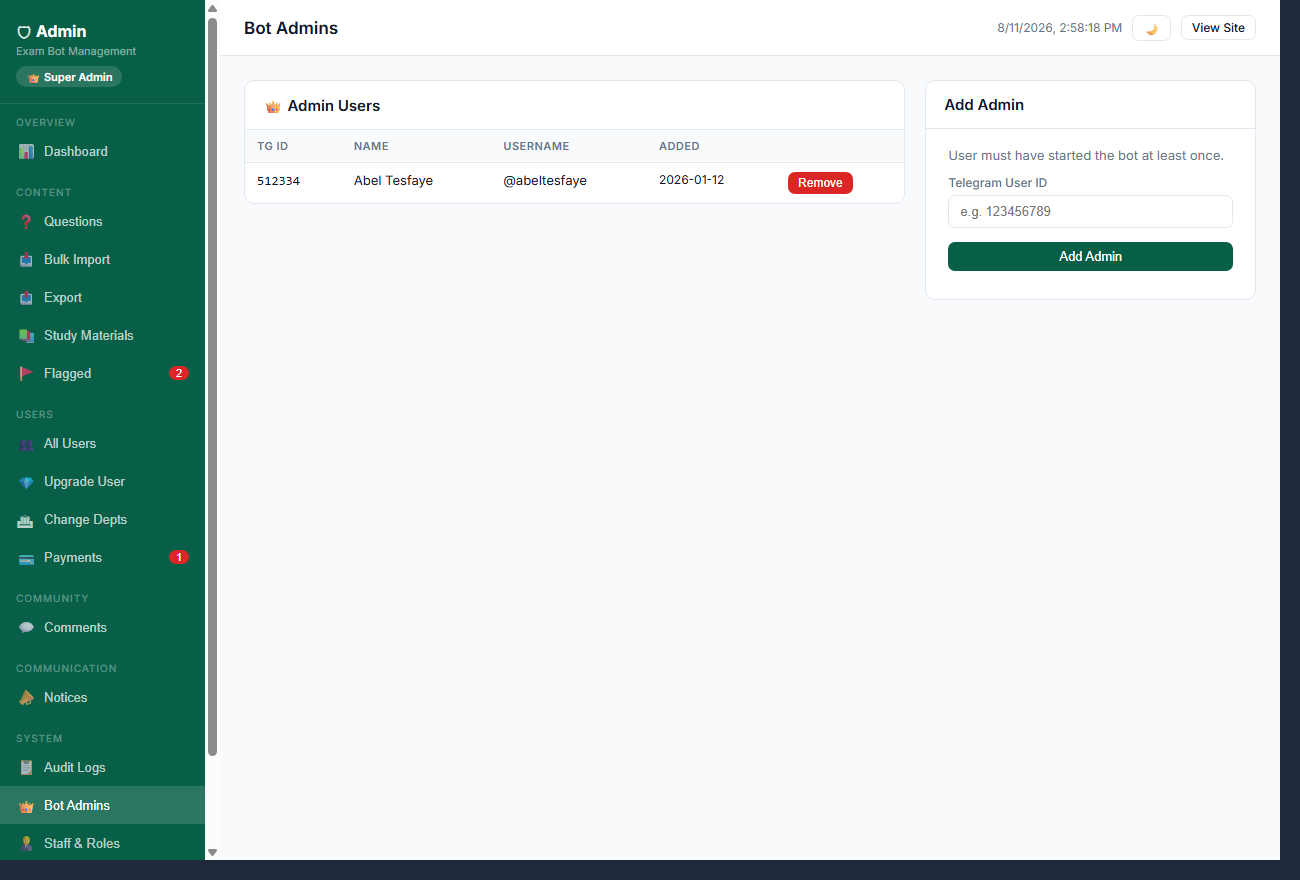
πŸ‘‘

Bot Admins

System
needs manage_admins

Telegram accounts allowed to run admin commands in the bot. Separate from website staff.

  1. Add someone by their numeric Telegram user ID β€” a username is not enough.
  2. This grants control of the bot, not this panel. Website access is granted in Staff & Roles.
  3. Remove people the day they stop needing it.
The Bot Admins page of the admin panel
Bot Admins β€” click the image to open it full size
πŸ§‘β€πŸ’Ό

Staff & Roles

System
needs manage_admins

Who can open this panel, and how much of it they can use.

  1. Grant access to an existing website account by email, then choose a role.
  2. Viewer reads only. Moderator also handles flagged questions. Admin adds questions, users and payments. Super Admin adds staff management.
  3. Give the smallest role that lets someone do their job; you can raise it in seconds if it turns out to be too tight.
  4. A sidebar item someone cannot see is a privilege their role does not include β€” that is the gate working, not a bug.

Deactivating an account ends its access immediately.

The Staff & Roles page of the admin panel
Staff & Roles β€” click the image to open it full size
πŸ”—

Agents

System
needs manage_users

Referral links for the people who recruit students for you, and the signups each one produced.

  1. Create Agent Link generates a code and a link belonging to that agent.
  2. Only new accounts opened through the link are credited. Existing users clicking it are not counted, so agents cannot claim people who already joined.
  3. Click an agent's row to see exactly who they brought in, and whether those people went premium.
  4. Deactivating a link stops new signups counting; people already credited stay credited.
The Agents page of the admin panel
Agents β€” click the image to open it full size

Add Question

Confirm